

Subscription Manager From The Customer's Perspective
A tour of the customer-facing Subscription Manager experience
Once customers subscribe to your products, they can manage their ongoing orders through the Subscription Manager. It lives in the account section of your store, keeping their subscription and personal details secure.
The Subscription Manager ships with a default theme that’s fully tested and ready to launch. If you’d like to customize the look and feel to match your site, head to Subscriptions > Management in Ordergroove’s top navigation.
Actions Customers Can Take in the Subscription Manager
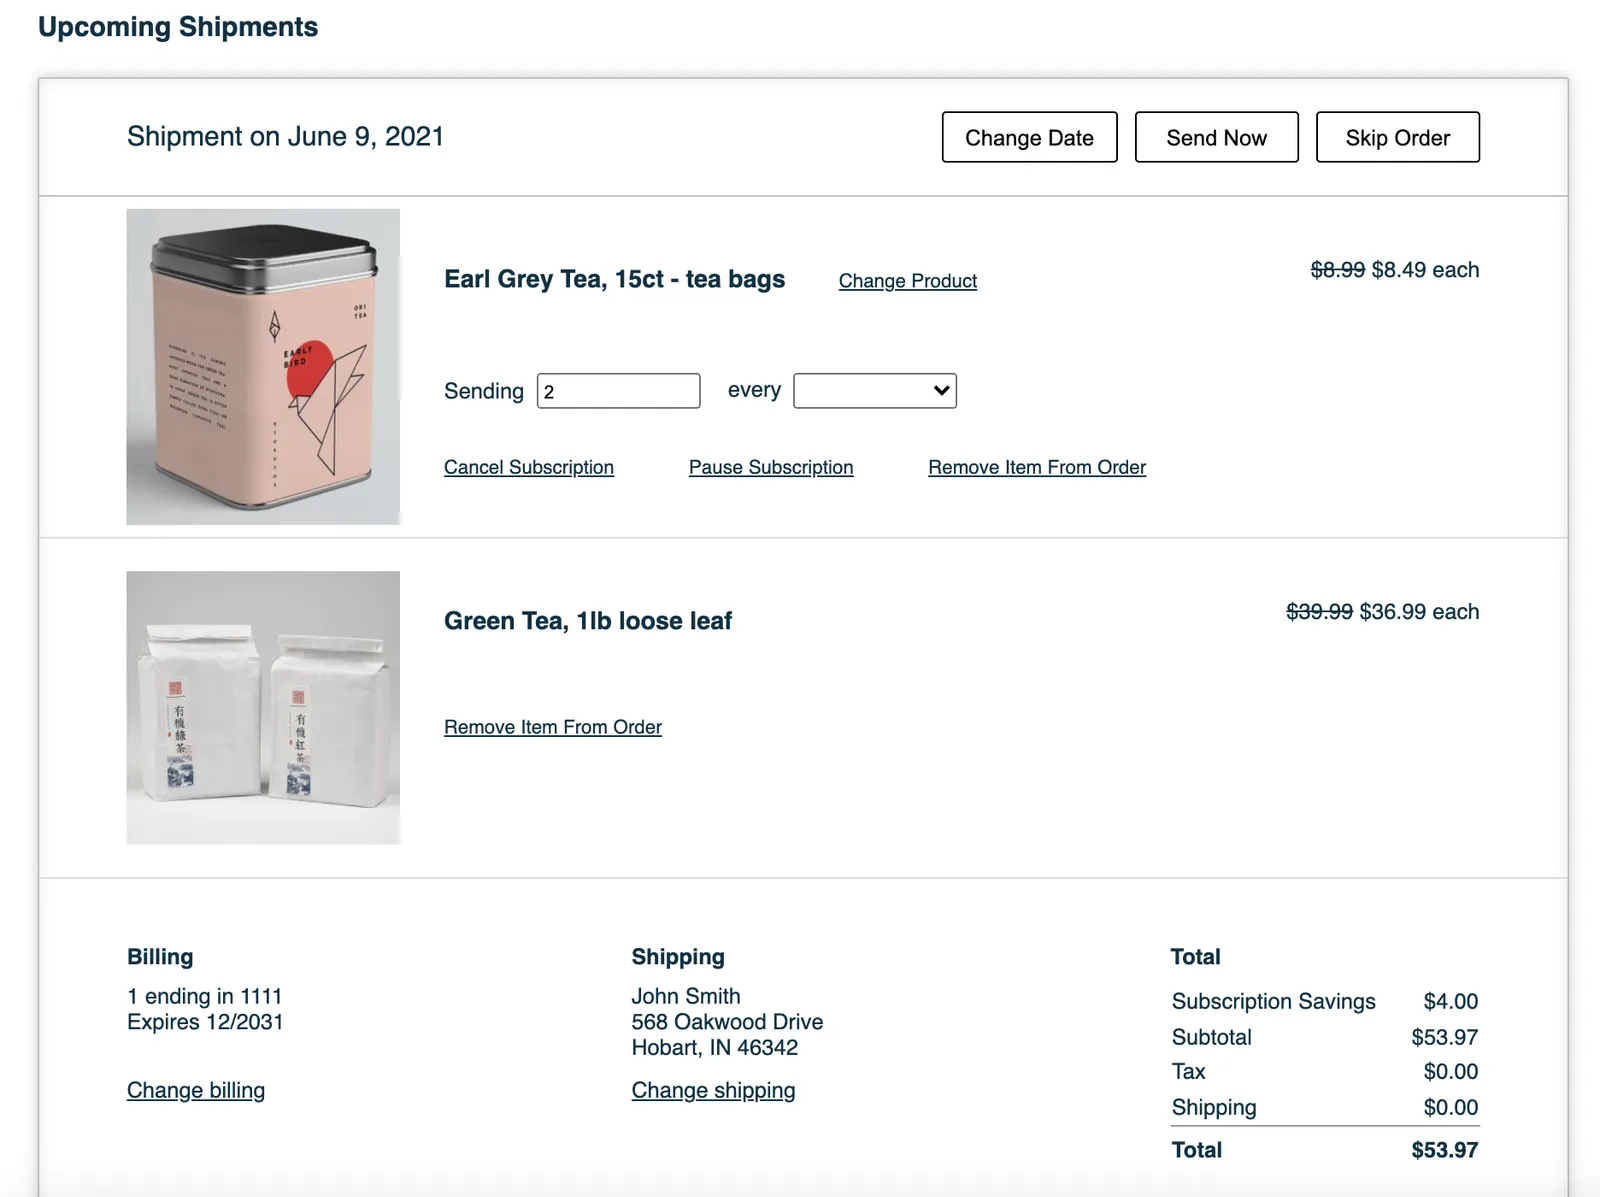
The Subscription Manager allows customers to self-manage various aspects of their subscriptions by logging into their account on the store website.
Send Now
Queues the order on Ordergroove’s servers for placement to your eCommerce system today rather than its originally scheduled date. Once a customer clicks “Send ASAP,” the order will go into an “Order Processing” state where no further edits can be made. Subscription items will have a new order created for today’s date + subscription frequency.
Change Order Date
Updates the shipment date for the entire order. If the new date coincides with an existing order that has the same billing and shipping information, the orders will be merged.
Skip Shipment
Effectively cancels an order in the subscription series. Calculates the next order date by adding the subscription frequency to the current order date, regardless of today’s date.
Remove Item From This Shipment
Removes an individual item from the order. Removing all items from an order effectively cancels the order (but not the subscription). When enabled, there must be at least two items in the order for this option to display. This feature applies to subscription items only — customers can remove one-time Instant Upsell items even if this option is disabled in Ordergroove.
Cancel Subscription
Cancels the subscription and any future orders for that item. Customers will be prompted to select a cancel reason.
Pause Subscription
Changes the order date of an individual subscription item rather than the entire order. This option only displays when there are at least two items in the order.
Change Billing Information
Allows customers to update their payment information. This will either link to an external payment wallet or open an Ordergroove modal, depending on payment vaulting ownership.
Change Shipping Information
Allows customers to update their shipping address. This will either link to an external address management page or open an Ordergroove modal, depending on program requirements.
All of the features above are configured in Ordergroove, under Subscriptions > Management.
Change Quantity
Changes the quantity of an individual item. Quantity options for your subscription program can be configured in Ordergroove under Subscriptions > Subscription Settings.
Change Frequency
Changes the delivery frequency of an individual subscription item. Changing the frequency has no impact on the next upcoming order date. Frequency options can be configured under Subscriptions > Subscription Settings.
SKU Swap
Allows the customer to change their subscription product from a limited set of options (e.g., swap from one size to another for the same brand). SKU Swap groups can be defined using the product configuration file. SKU Swap is only available for subscription items, not one-time Instant Upsell items.
The Subscription Cancellation Customer Experience
Within the Subscription Manager, customers can cancel their subscription by selecting the Cancel Subscription option at the subscription item level.
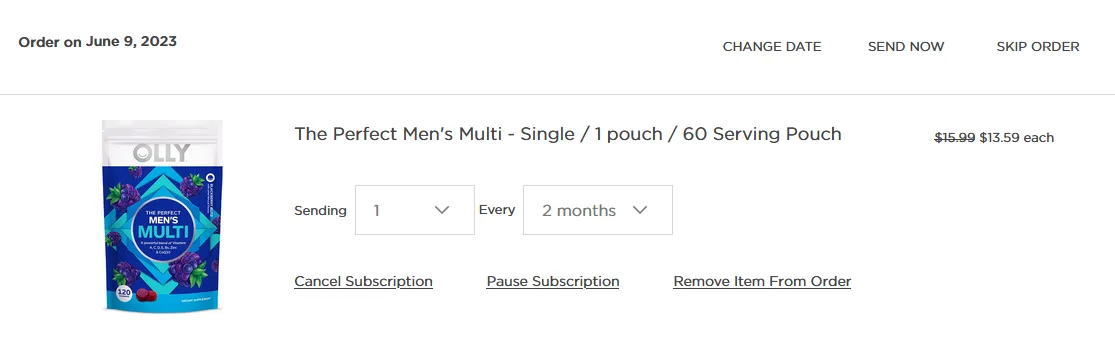
By clicking Cancel Subscription, the customer will be prompted to choose from a list of cancellation reasons. A selection is required to proceed. If the customer selects “Other,” they must fill in the free text box. To complete the cancellation, the customer selects Cancel Subscription.
Note: If there are multiple items in an upcoming order, only the selected item will be canceled.
If the customer opts not to cancel, they can click Nevermind on the modal or the X in the upper right corner.
Cancellation Email
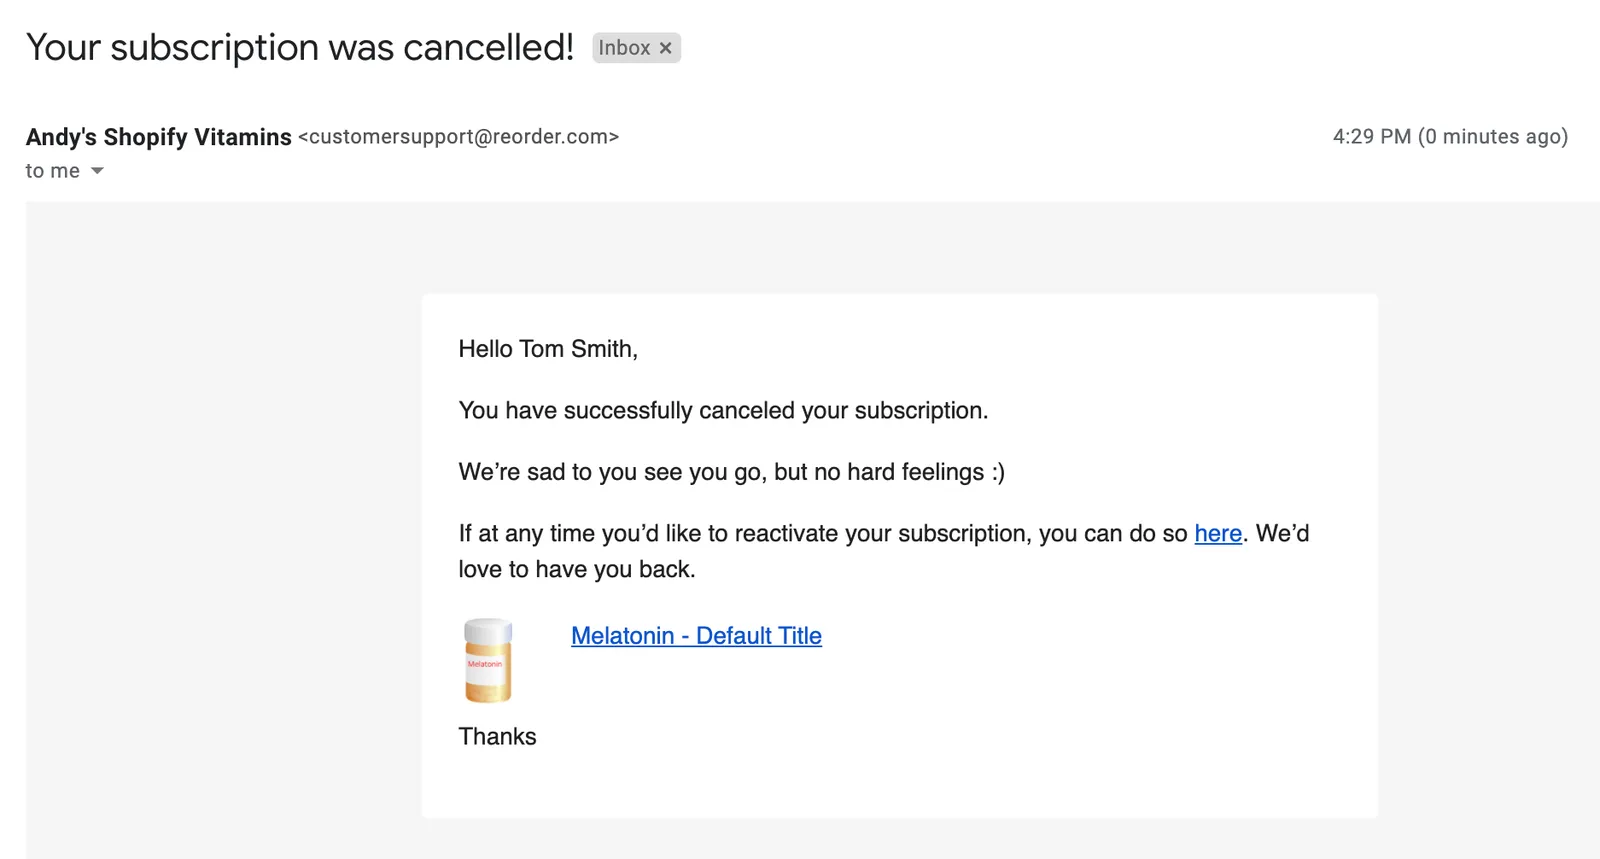
Once a customer has canceled their subscription, a confirmation email will be sent to their associated email address. The email includes the canceled product and links that redirect the customer back to the product or to their Subscription Manager.
You can style and configure these transactional emails to align with your brand.
Reactivating a Subscription
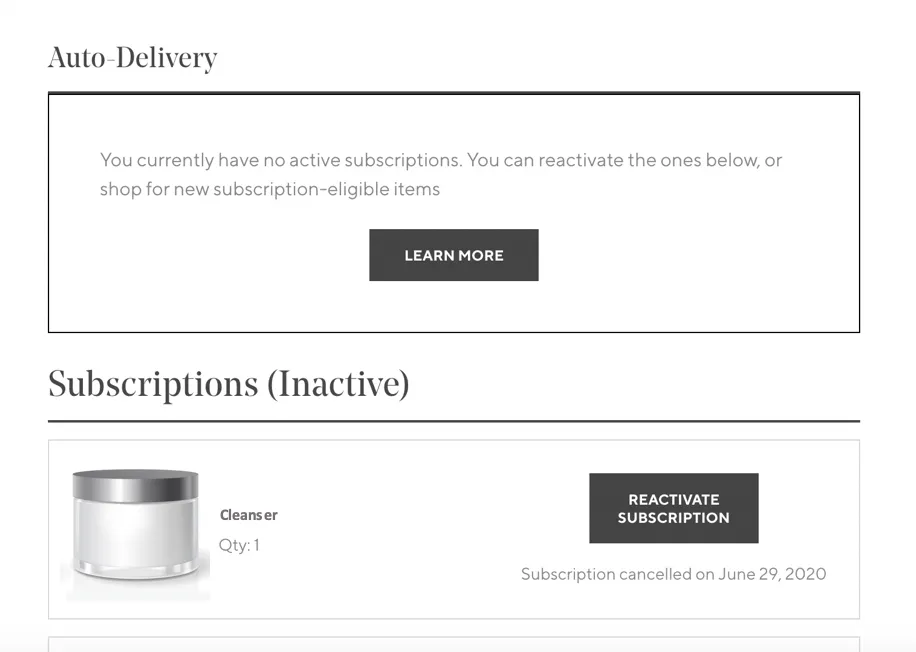
Canceled subscriptions appear in the Subscription Manager at the bottom of the interface under Subscriptions (Inactive). The product, cancellation date, and a reactivation button appear for each inactive subscription.
Customers can reactivate a canceled subscription at any time by clicking Reactivate Subscription. If the product has been discontinued, the button will appear greyed out and the customer will be unable to reactivate.
The Customer Payment Edit Experience
Ordergroove recommends a default payment method be set for all recurring orders. A customer’s subscription payment information will display on the Subscription Manager, in select transactional emails (if configured), and in the CSA under their account details.
When a customer checks out with a subscription, the payment method is vaulted and tokenized. The token and relevant card details are passed to Ordergroove via the Purchase POST. Subscribed customers should have access to stored payment details within their account settings to update payment information and set a default method for recurring orders.
On the Subscription Manager, clicking Change billing redirects the customer to their payment wallet on your site to edit or update payment information.
When a customer updates their payment method, it should update their payment information in Ordergroove across existing subscriptions. In some cases this update is automated, but depending on your implementation you may need to set up specific API requests to handle it. Refer to your implementation documentation for platform-specific handling.
Payment information cannot be edited directly within Ordergroove — all changes must be made through your eCommerce platform.
On Shopify Payments
The customer clicks Send Email on the Subscription Manager page.
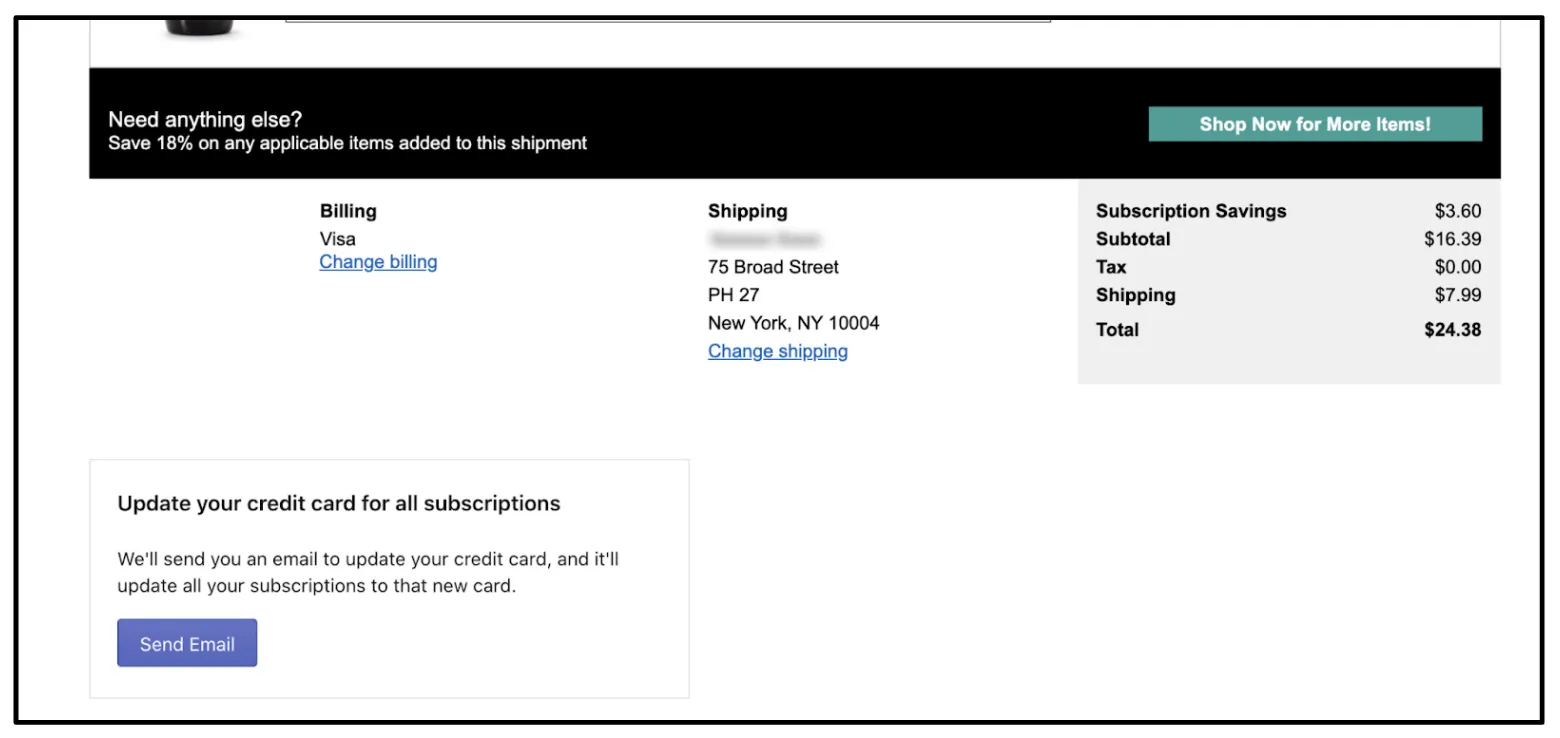
The customer receives an email directing them to provide new payment information through a checkout-style page on your Shopify store, where they can add a new credit card to their profile.
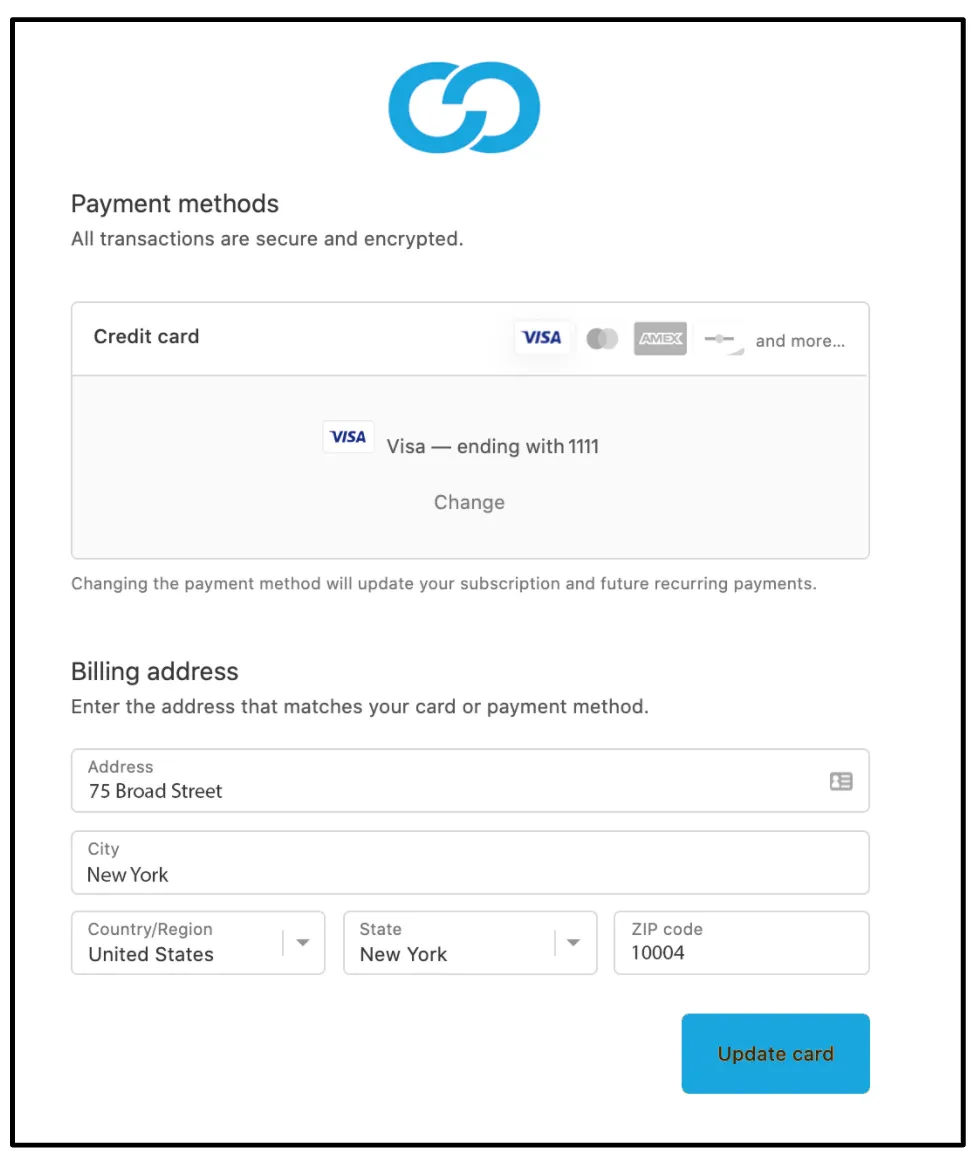
Shopify notifies Ordergroove that the customer has updated their credit card, and Ordergroove updates all subscriptions for that customer to use the new payment method.