

Setting up a Webhook
Create, configure, disable, re-enable, and delete webhook routes in RC3
Creating a webhook
This is the first step to start using Ordergroove’s webhooks system. Multiple webhooks can be created if necessary.
Follow these steps for each webhook you intend to create:
- Log in to Ordergroove.
- Go to Developers > Webhooks.
- If you haven’t created any webhooks yet, click on the Create webhook button at the bottom of the page.
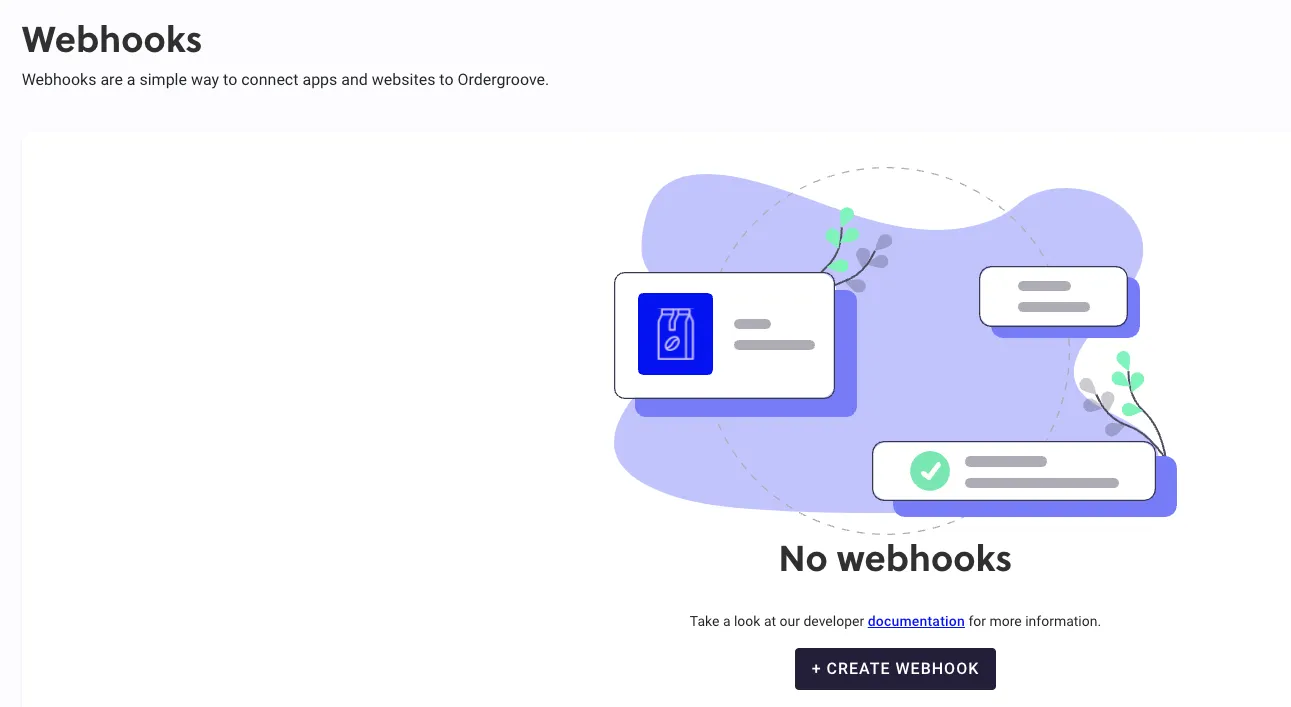
- If there are already some webhooks created, click on the Create button at the top of the page.

- Configure the webhook to be created.
- Choose a name for the webhook.
- Choose a webhook target.
- Select the event types the webhook is going to subscribe to.
- Optional: Click on Advanced settings to customize the outgoing payloads for the current webhook.
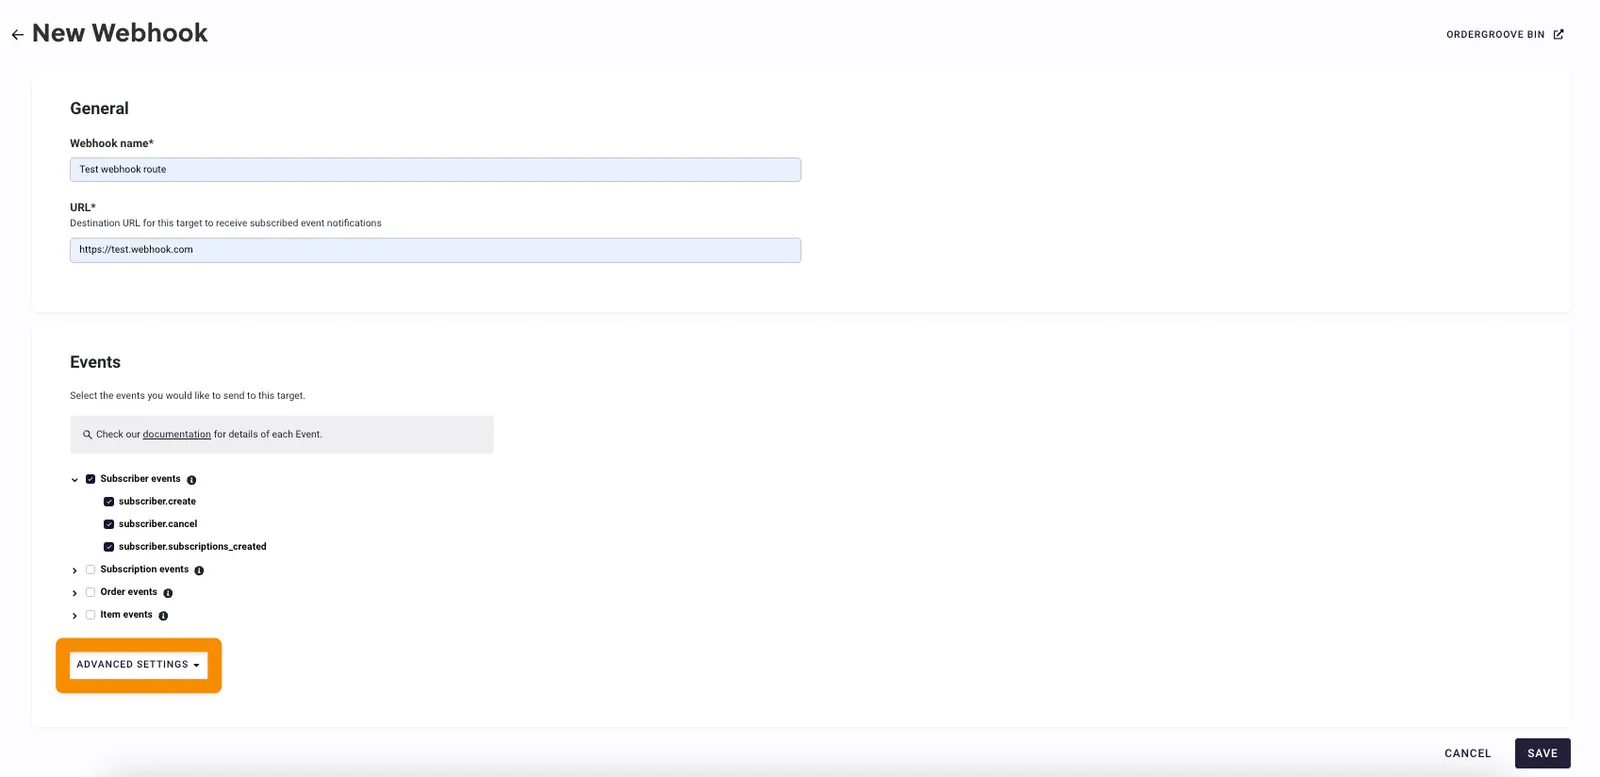
- Click Save at the bottom of the page.
- After the webhook saves, it’ll redirect you back to the Webhooks page with the new webhook listed.

- Upon successful creation of the new webhook route, the Ordergroove system will immediately activate it. From this point forward, whenever any of the subscribed event types occur within the Ordergroove system, a webhook will be automatically delivered to the configured target. Additionally, if you chose to customize the outgoing payloads when creating the webhook (optional step 5), this configuration is going to be reflected in the outgoing requests. Otherwise, default payloads are going to be sent.
- Make sure you double check that the webhook is working correctly. To verify the requests coming from the webhook that you created, copy the verification key of the webhook and use it on the receiving servers to verify the requests’ authenticity.
Subscribing to event types for a webhook route
The webhooks system lets you subscribe to specific event types for each route so that only webhooks tied to the selected types are sent. The different event types available in Ordergroove are represented as strings in the format <ENTITY>.<EVENT>. For instance:
order.reminder— Triggered when an order reminder is sent.subscription.created— Occurs when a new subscription is created.item.change_quantity— Indicates a change in the quantity of an item.
By limiting the event types a route is subscribed to, you can significantly reduce unnecessary traffic to the targets. This focused approach ensures that receiving systems only process the events that are most pertinent to your operations, enhancing efficiency and clarity.
The steps to subscribe to specific event types for an existing webhook route are as follows:
- Log in to Ordergroove.
- Go to Developers > Webhooks.
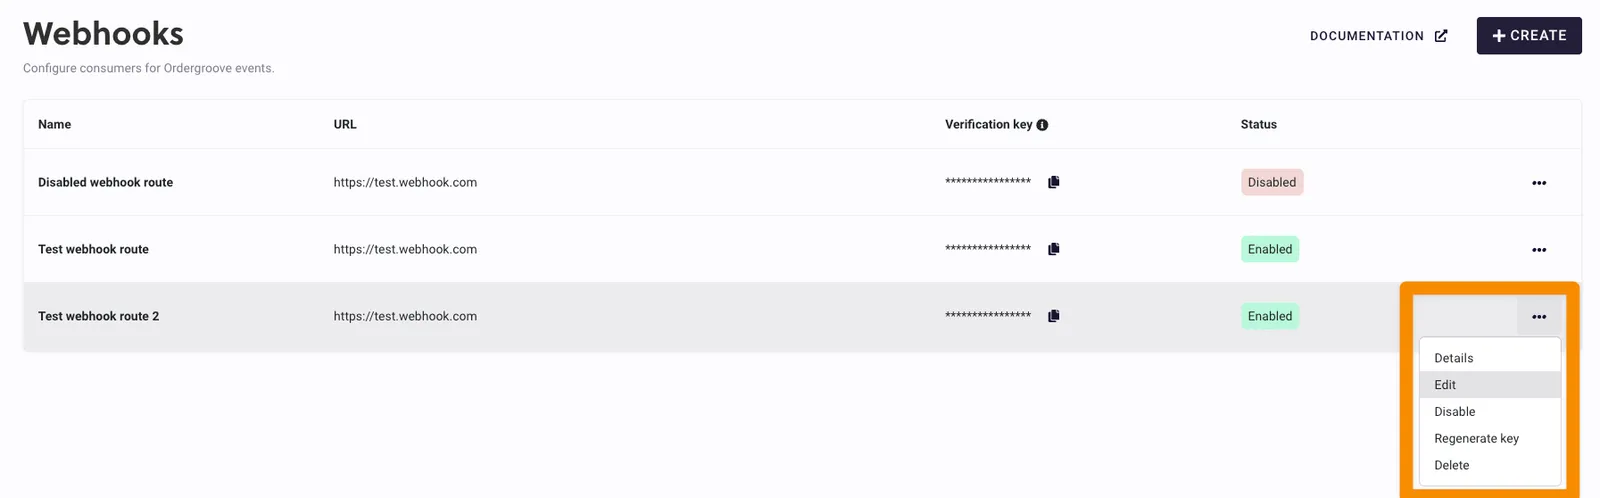
- Locate the webhook you want to edit, click the 3 dots, and click Edit.
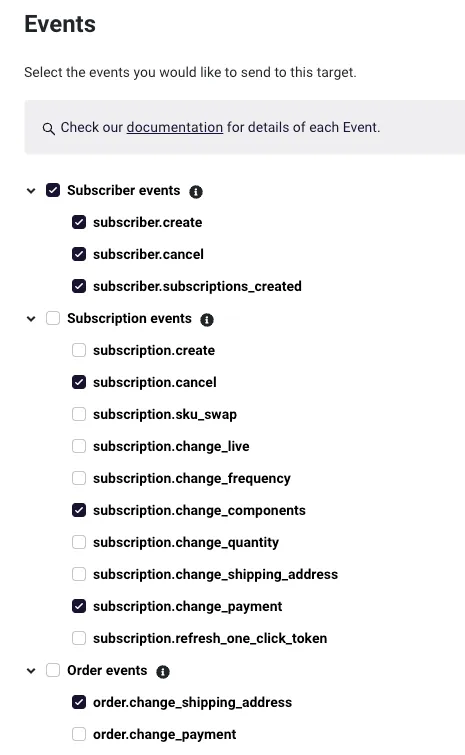
- Go to the Events section and select the desired event types. You can select all events of a given group.
- Click Save at the bottom of the page.
- After you save, events of your selected types in Ordergroove are going to start being communicated to the webhook target.
Disabling a webhook
If you want to stop receiving webhooks from Ordergroove for a given route, it is possible to disable it so that no new webhook events are transmitted to the specified target. Note that if there is a different webhook with the same configured target which is still enabled, webhooks are still going to arrive at that target through this other route.
The steps to disable a webhook route are as follows:
- Log in to Ordergroove.
- Go to Developers > Webhooks.
- Locate the webhook you want to disable, click the 3 dots, and select Disable.
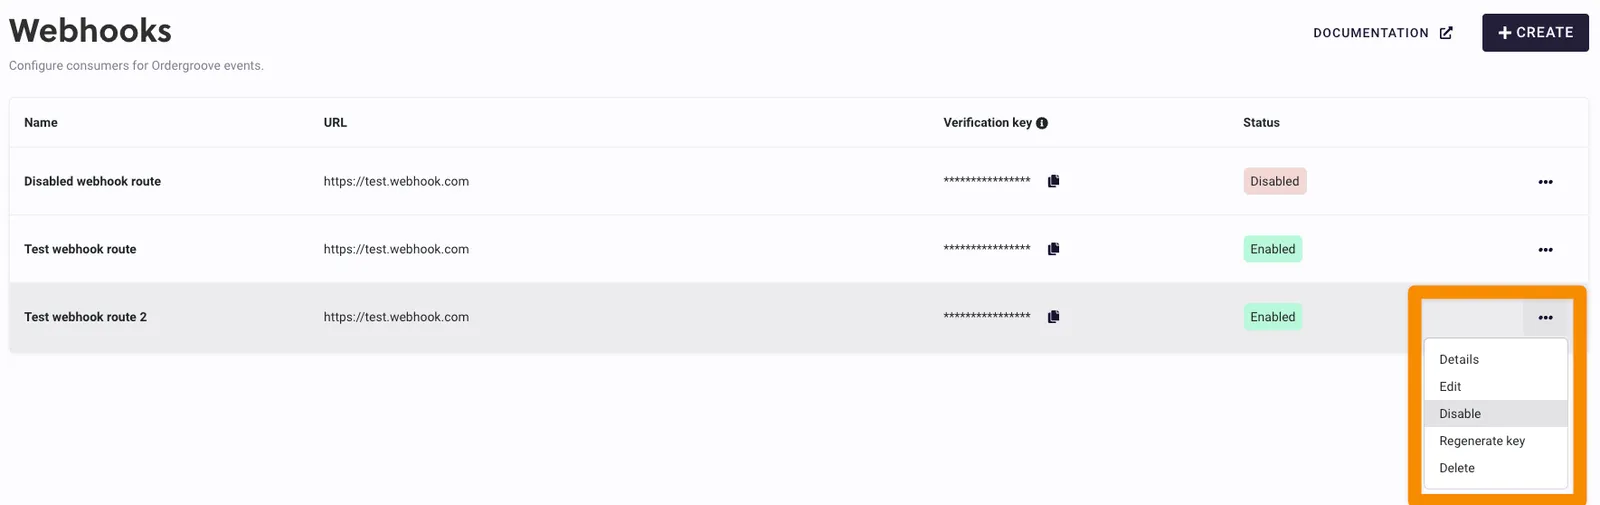
- Confirm you want to disable the selected webhook.
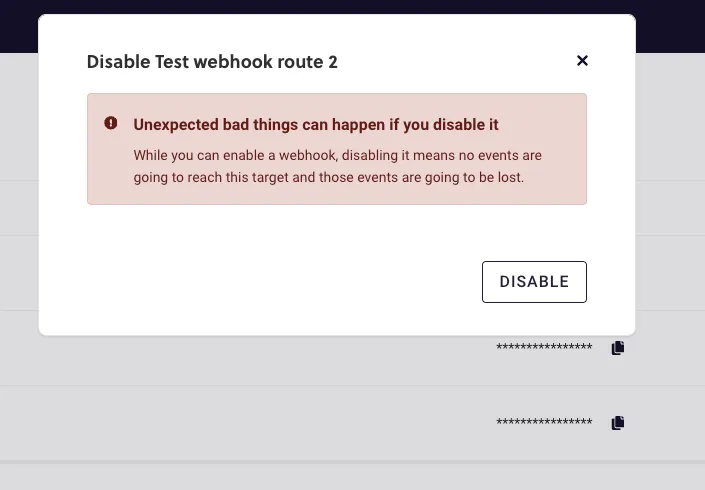
- Once it’s disabled, no new Ordergroove webhooks are going to be delivered to this route.
Re-enabling a webhook
A webhook can be easily re-enabled. The only caveat is that all the events that happened during the time the webhook was disabled are not recoverable — only events happening after re-enabling the route are going to be sent through it.
- Log in to Ordergroove.
- Go to Developers > Webhooks.
- Locate the webhook you want to enable, click the 3 dots, and select Enable.
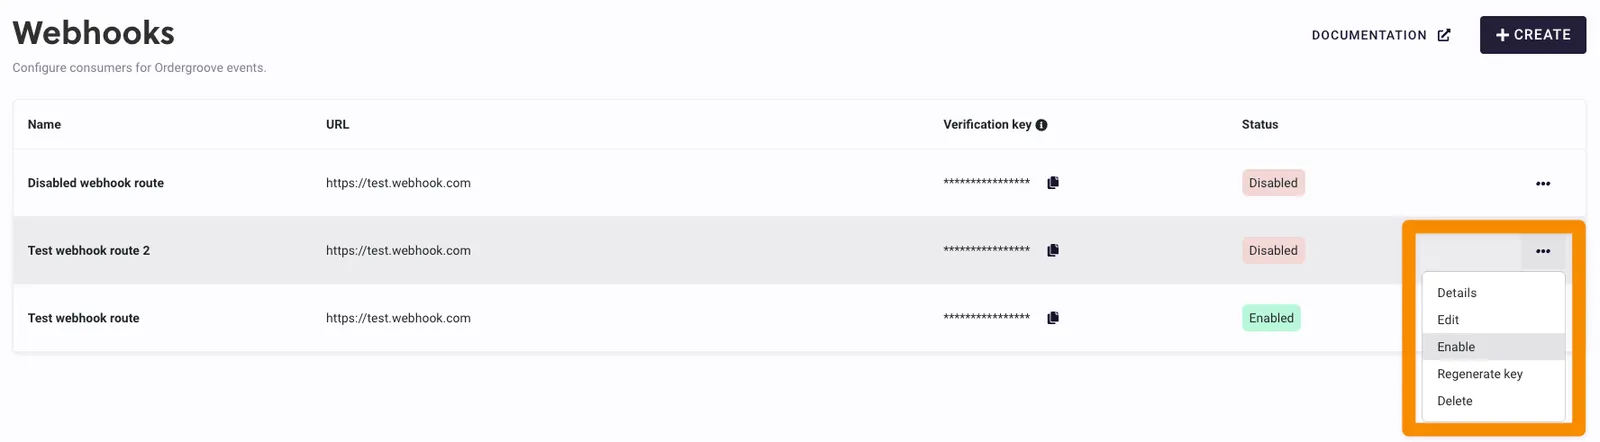
- Once it’s complete, Ordergroove webhook events are going to resume their deliveries to the specified target using the route’s current configuration.
Deleting a webhook
If you are certain that a given route is not going to be used anymore, it is possible to delete it so that it doesn’t get listed on the Webhooks page. This action cannot be undone.
- Log in to Ordergroove.
- Go to Developers > Webhooks.
- Locate the webhook you want to delete, click the 3 dots, and select Delete.
- Confirm the action by clicking I understand.
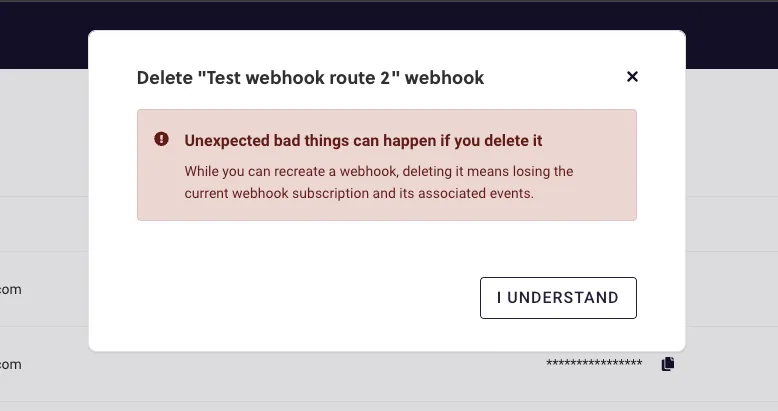
- Confirm the action by typing the word DELETE.
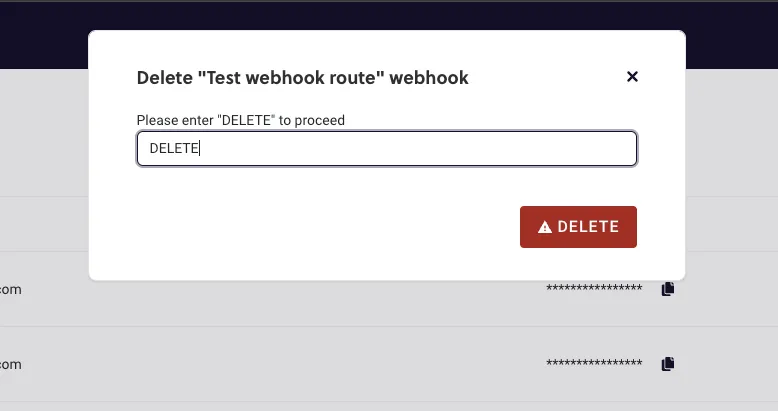
- When the webhook is successfully deleted, no webhook events are going to be sent through this route anymore. The only way to undo this operation is to manually create a new route with the same configuration as the route that was just deleted.